Saturday, October 01, 2011

T-shirt printing

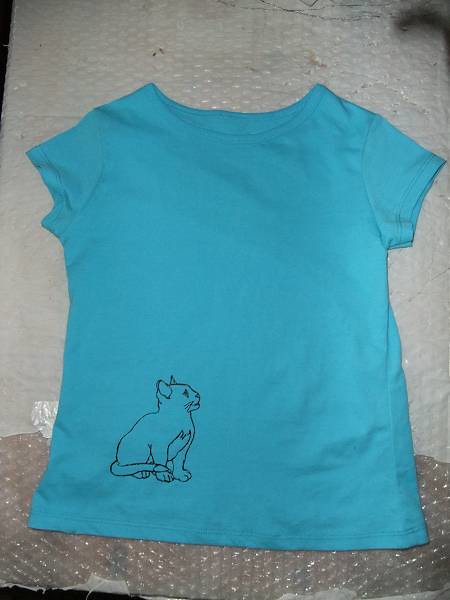
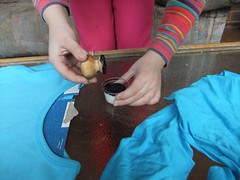
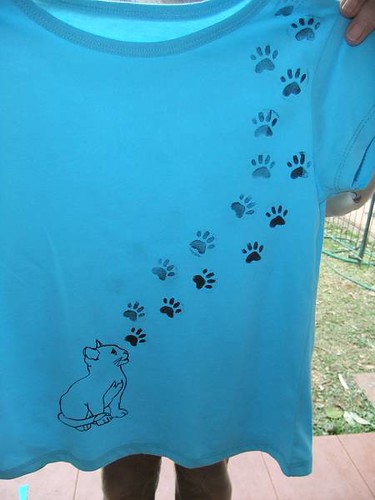
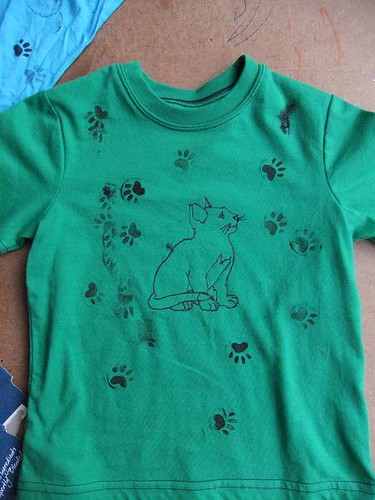
M and S both wanted t-shirts. M wanted a cat - surprise, surprise. And S wanted a shirt "just like M". M wanted little paw-prints as if the cat had walked over the shirt, but this was a bit sophisticated for her brother. I took pics of the whole process that you can see in this flickr set, but here are some highlights:

Just starting:
shirt01

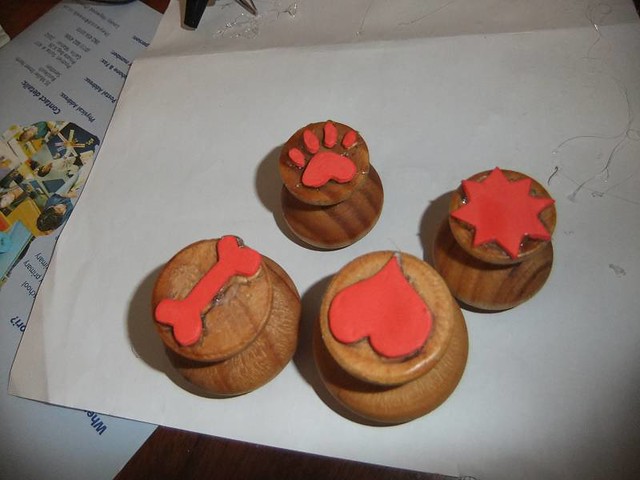
Then we made the stamps from sheets of craft foam and drawer / cupboard handles:

shirt08

We have used the others just as stamps, but only the paw-print was for the T-shirts.

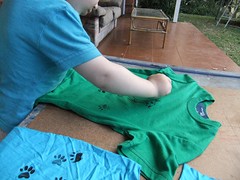
Finally, we STAMPED!
shirt20

and stamped...
shirt22

Until we got this...
shirt23

and this...
shirt25

Hooray!

Sunday, July 10, 2011

Children's crafty stuff

I discovered, quite by accident, that my son likes to do directed craft. He had shown absolutely no interest in painting or drawing, so I had not really tried to do any craft with him until Easter this year, when, in desperation and boredom, we made Easter chicks with two yellow circles and a black pen. And he loved it! I was flabbergasted. So I've decided that I need to do more cutting and glueing and directed craft.

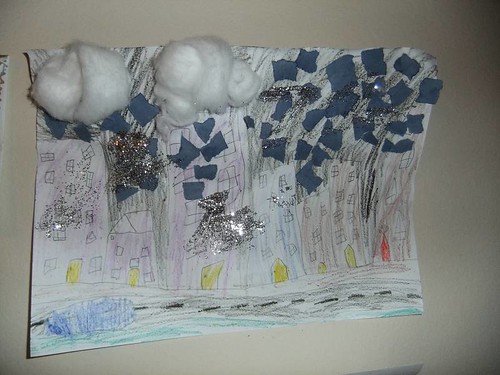
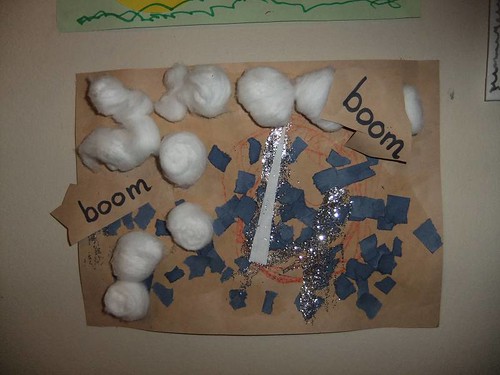
The little guy is fascinated by thunderstorms - terrified and fascinated. He is constantly wanting to look at thunderstorm pictures and was very taken with the idea of making his own one. I took some cotton balls, some blue sugar paper cut into strips, and some backgrounds. The children drew their backgrounds on to the paper, and then helped me tear the blue paper into "raindrops". My son didn't really do this - but the 6yo loved it. When we had enough rain, we painted glue onto the paper, stuck on cotton ball "clouds" and blue raindrops and let it all dry. Then we added some glue streaks which we glittered for lightning. Voila! 6yo picture looked like this:

2011_0710_RainPic6yo

My son, though, wasn't happy with his picture. Apparently, there should be thunder that goes "Boom!". So we added some, which my mom and I wrote and he cut out, and he stuck a random piece of paper onto his picture because it kind of fitted, I suppose. The final 2 year old version:

2011_0710_RainPic2yo

The red circles in the background are "children in the rain". So now you know. I liked the fact that they were given the same equipment, and the same instructions, and produced two totally different pictures. Also that despite the 4 year gap, they both enjoyed doing this.

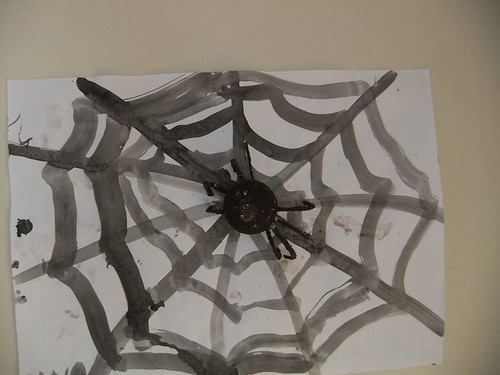
We also did some marble painting this break. I saw it at my son's nursery school and loved it. It requires virtually no set-up, and both children got great results. (I used an unused cat litter tray and tempera paint squirted straight into it. None of this "roll the marbles in the paint" stuff - way too much work!) The plan was to use the marble paintings as spider webs, and add spiders, but my daughter decided that her marble painting was "too special" and made a new web.

2011_0710_Spider6yo

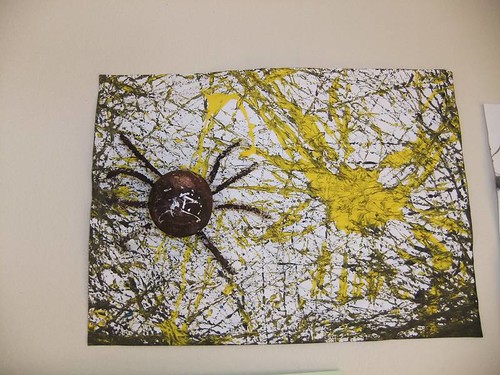
My son was quite happy to use his "web", only he really, really, wanted to play with his spider.
2011_0710_Spider2yo

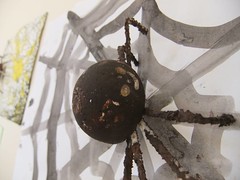
We made the spiders by cutting a small polystyrene ball in half, and gluing 4 twisted pipe-cleaners onto the bottom, then bending them up for legs. This wasn't as sturdy as I would have liked. If I did it again I think I would cut the pipe-cleaners in half, dip them in glue and wedge them into the ball bodies. We then painted them with normal tempera paint, waited for it to dry and drew on the faces with gold and silver markers. It was fun :).

My daughter's spider has a smile, and, though you can't see it in this pic, a tiny gold dot for its spinnerets:
2011_0710_SpiderCloseUp6

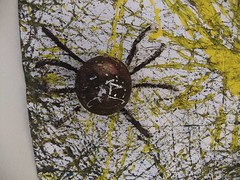
My son's spider has LOTS of silver eyes, as well as, apparently due to a spinneret confusion, lots of gold bums.

2011_0710_SpiderCloseUp2

Monday, February 14, 2011

Cat Cake

For my daughter's birthday, she requested a cake "carved into the shape of a cat". Yes, well, ok. How to start?

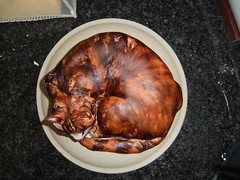
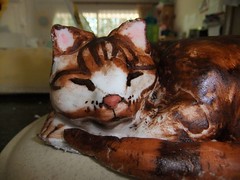
So I searched flickr for pictures of "cats curled up", and looked through a couple of thousand pics. I also took lots of pics of our own cats lying in the right pose, like this one,
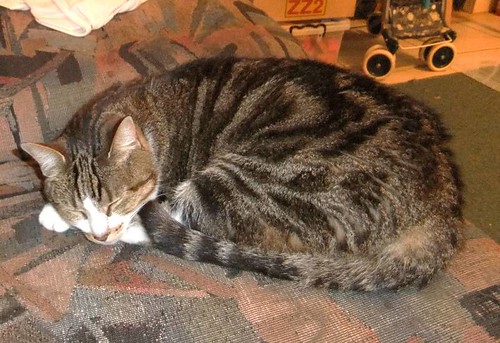
OurCat

and I watched these videos on sculpting a cat. I made a little rough cat out of playdough, and I found a porcelein cat in almost the right pose in my daughter's toy box.

Then I started on the baking. Since the curled up cat is a fairly round shape, I baked the cake in a 2l pyrex bowl - both the idea for baking in a bowl and the recipe for the cake from Debbie Brown's wonderful book "enchanting magical cakes". I used the recipe for chocolate madeira cake, as that carves well, but I doubled the cocoa, since I've used this recipe before and found it not *quite* chocolate-y enough.

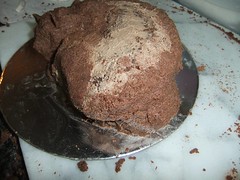
Sorry - no pics of the plain cake :(. Then I looked at the basic shape of the cat. I decide that it was fairly flat on top, with a slope in two directions, falling off from the hind end of the cat towards the nose, as well as from the back (spine) towards the front (the feet and face side). So I took a large flat knife and carved that. Then I shaved a bit of each side of the cake to get a more oval shape. Finally, with a small knife, I marked in what I figured what the basic shape on the top of the cake, and starting paring away. I don't have any pictures of these parts because I was absolutely terrified of stuffing it up, and the only way I could get myself to do it at all was to pretend this was just a practise cake, and that I would probably have to do it all again the next day. Here you can see the results of the initial carving, as well as the playdough and porcelein cats I was using as guides.
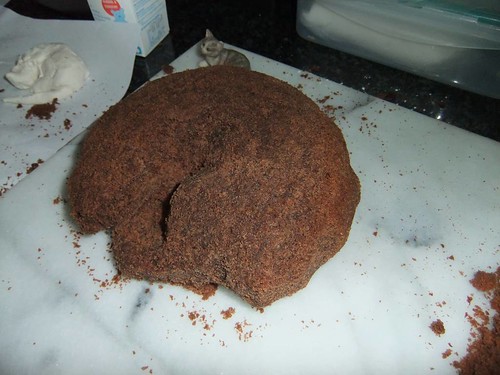

CatCake01

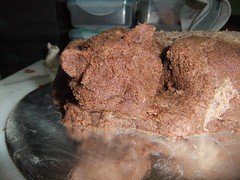
Here is a side picture of the carved cake to try to show what I mean by the double sloped shape. You can picture the cat's bottom as the top of a gentle hill, where we are only carving the front quarter of the hill coming down from it.
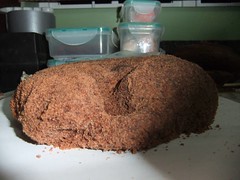
CatCake03

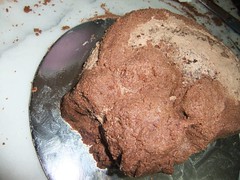
Another view of the initial carved cake:
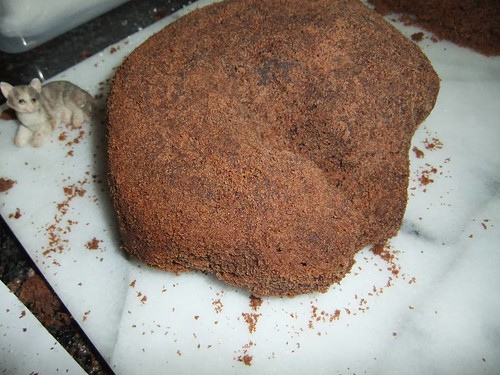

I think it looks quite lizard-like at this point :). I wasn't aiming for facial features, or shoulder or thigh bulges and I was planning to put those in later using fondant. BUT, I am working in high heat and humidity, and I have had to make my modelling paste using extra tylose in order to avoid it collapsing completely, so I felt that it was too stiff to use for the modelling parts. Instead, I used an idea from this excellent description of the making of a prize-winning cake, and mixed up some cake "clay", using the crumbled offcuts and some chocolate buttercream. No recipe, I just kind of mixed them together until it felt like something I could work with. I used the cake-clay to add shoulders, the thigh-bulge 'behind' the cake, some extra bulk to the leg at the front as well as the facial features.

Here we have thighs...CatCake05

shoulders .....CatCake06


face ......CatCake07


and the finished kitty, waiting for fondant.
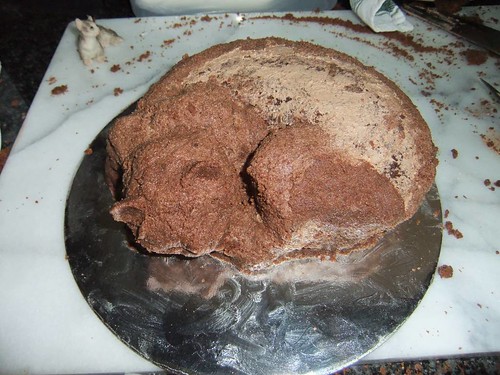
CatCake04
The silver cake board is 203mm in diameter.

Next for the fondant. I couldn't find a shop with any in stock, so I made my own, using a recipe out of "Cakes to inspire and desire", because this book featured the following inspiring words about sugarpaste - "it is also easy and inexpensive to make your own" :). She was right.

I didn't think that the cake clay ears of the cat would stand up to being covered with fondant, so I replaced them with fondant ears before beginning. I also made a fondant tail. Here you can see the cat in the process of being covered. I love the difference this makes to it. It suddenly starts looking like something good.
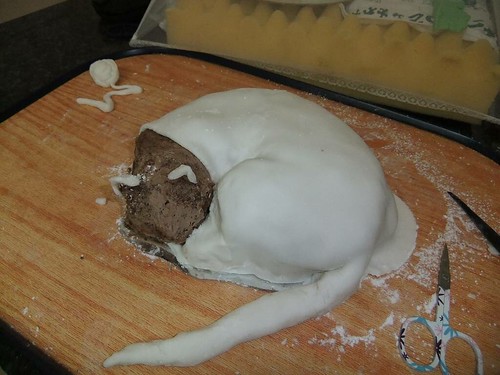
CatCake09

You can see that I've now cut the cake board underneath to match the shape of the cat. I stuffed up though, and cut it before putting on the tail, which made handling it later a little tricky.

Then I used gel colours thinned with water to paint the body. I tried to use a fairly course paintbrush so that the brushstrokes would look "furry". I used "warm brown" and "chocolate brown" cakeflora gel colours.

Here you can see the birthday girl helping to paint her cake.
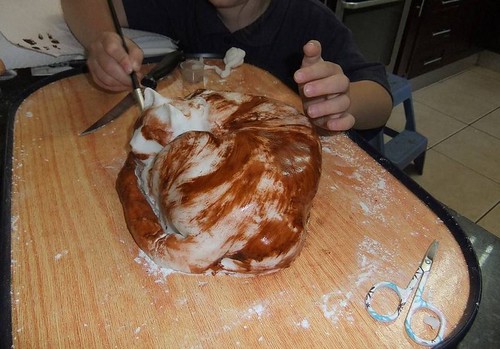
CatCake10

I made a little fondant nose, and pushed in the nostril with one of my fondant tools - but the back of a paintbrush would probably work too. The ears I brushed with pink petal powder, and I sort of touched up the body with brown dusting powder too. Here is the finished kitty:
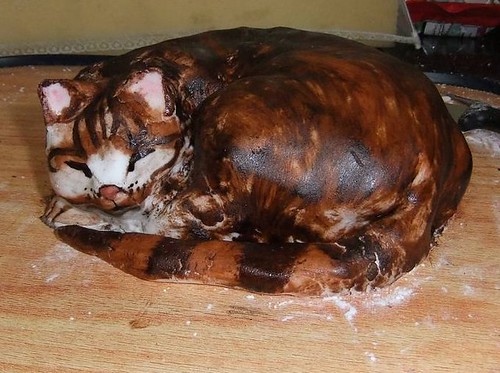
CatCake12

And a couple more views just to see the shapes:

Back view:
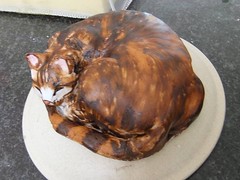
CakeCake13

Top view:
CatCake14

Face close-up:
CatCake15

I really really wanted to try a cushion cake, but I ran out of time. So I just stuck two chocolate sponge cakes together and shaped them slightly, then covered them with pink fondant. The cat was slightly too big for the top of the "cushion", and it looked a bit wierd with its bum stuck into mid-air, so I decided it would be sitting in a tangle of wool, and used the rest of the fondant to make the long strings that boosted up the sides of the bottom cake. Her name was spelled out in unravelling balls of wool at the front of the cake too.

Ta-daaa!
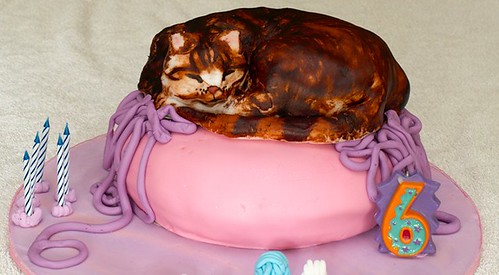
CatCake16


One happy birthday girl :).
Saturday, October 30, 2010

Not dead, just busy

But I have plans (TM) to post here when I get a chance. I have another 2 cakes to post, plus some cupcakes, and I'll be making at least 3 fancy cakes in the next three months (3 birthdays!)

Wednesday, June 03, 2009

Even more roses, and a cake

I promised to post pics of what I did in the edible rose workshop that I got to go to as a birthday present, so here they (or their links!) are. It was a great workshop, really fun, and I learned quite a lot. I now need to get a couple of fragrant rose bushes for the garden though, to put into practise things like Rose syrup. Mmmm.

We started out by crystallising rose petals with castor sugar. At the end of the workshop we reassembled those petals into a mini-rose on a cupcake. This is quite a cool effect, and one I would never have considered on my own.

We also got to do fondant (plastic) icing roses. Mine wasn't great. I started out by making the centre much too big, and that kind of stuffed it up from the start. I'll need to practise.

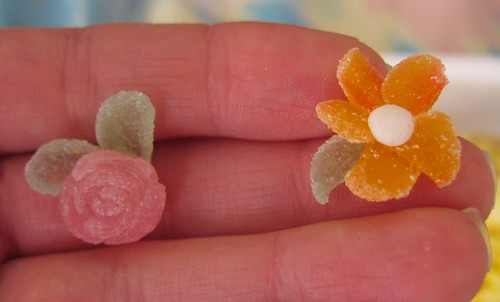
My favourite edible rose decorations for the day were the little roses made from Jelly Tots. I liked these so much, you don't even have to go browse for the pic :).

JellyTots2

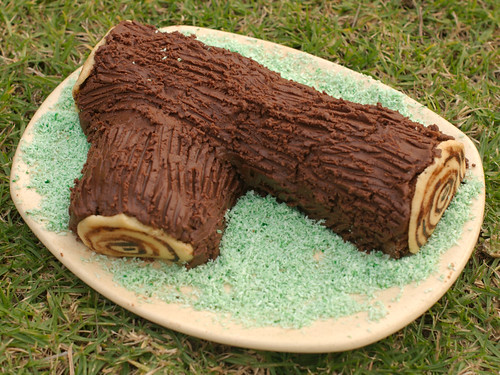
Next up:my birthday cake. I wanted to do a chocolate log with little woodland creatures all around it. But it didn't happen. Maybe next time. The cake is a chocolate roulade (recipe and cake instructions from this book), filled with double cream and hazelnut spread. The ends are homemade almond paste, and the bark is chocolate buttercream, which is not light and fluffy, no matter what I do!
My birthday log cake

Monday, June 01, 2009

Done!

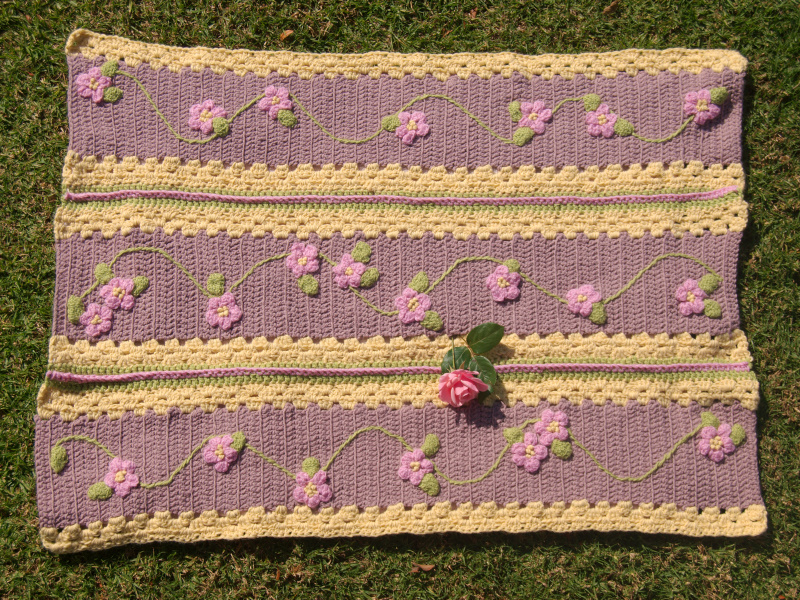
I finished the Wild Rose Blanket just in time. The teacher loved it. (I loved it too). It looked really good, and the colours worked really well. Since I don't consider myself to have a great eye for colour I was very pleased about that. Each time I added a new colour (the yellow border, the green extra interior border, the pink join) it just made the other colours brighter and more beautiful. I used Elle Gold DK (courtelle) for the main part of the blanket, and I was really surprised at the difference between the dusty rose and the yellow. The dusty rose colour is much harsher and feels thicker, although they are both double knit. The pale yellow feels really really silky. (Click pic for bigger version)


There are a couple of other pics of the work in progress on flickr.

Now I am using the left over yarn to make a hat for M. I was going to do a wild rose hat, using the same pattern for embellishment as the blanket, but when I asked her if she wanted a woolly hat to wear, she said "Yes, I'd love a duck hat!". So I am making a dusty rose hat with a yellow duck face inset.

My daughter's idea of what a project should look like and mine are often poles apart, so it's really really important to get her to clarify exactly what her mental picture of something is before making it. (This goes double for cakes!)

I've also finally finished my brother's wedding sampler. I am never ever again doing a "me to you" bear sampler. The backstitch fur was horrible, and the colours were so similar that I could only work in daylight. That's a severe limitation on a crafter with kids! Admire. It has taken 3 years! (I stitch really slowly, but I don't give up!) (Again, click pic for full version if you can't see the whole thing).

Wednesday, May 20, 2009

Rose-tinted glasses

I'm making a blanket for my daughter's teacher. The teacher goes on Maternity leave next week. I have to finish this thing by Friday. It is taking a lot longer than expected - mainly because I didn't work out how long I expected it to take. If I didn't think this teacher was actually absolutely fantastic with my daughter, I would be not be making the blanket. I'm guessing I won't be getting a lot of sleep tomorrow night....